Showing posts with label designer pinnies. Show all posts

Saturday, 14 January 2012

There's always time for biscuit making!!!

This week has been a busy week.  For some reason I was under the impression that I would feel like I had a little more time as my little Tinker (3) started his two and a half days at nursery this week.  Silly really as there is always something that results in you dashing around!  New products to photograph and edit, parcels containing my goodies to be wrapped and sent, and fabric to moon over.  Oh, I also had a play around on photoshop with some fabric designs, and I am now waiting (I'm not a good at waiting!) for a sample to arrive, so I guess I have had a little time to do something I have wanted to do for a while.

We (myself and the Tinker) did however have time to make two batches of delicious biscuits!  The first one, made at the beginning of the week, disappeared very quickly... so yesterday we made some more, ready for the stroll back from school.


These biscuits are really easy to make (you could have them made in 30mins), are a healthier alternative to shop bought ones, and really are truly delicious!  It's a recipe I got from a BBC Good Food magazine years ago, I did look for a link to it on their website, but was unable to find it so here it is.

Anzac Biscuits (makes 20)

85g/3oz porridge oats
85g/3oz desiccated coconut
100g/4oz plain flour
100g/4oz caster sugar
100g/4oz butter, plus extra for greasing
1 tbsp golden syrup
1tsp bicarbonate of soda

1.  Heat the oven to 180°C/fan 160°C/gas 4.  Grease a couple of baking trays.  
2.  Put the oats, desiccated coconut, flour and sugar in a bowl and mix together.
3.  In a pan melt the butter, then stir in the syrup and take off the heat.
4.  Put your bicarbonate of soda into a cup and add 2 tbsp hot water, then add this mixture to the butter and syrup mixture and watch it bubble!
5.  Pour the butter mixture over the dry ingredients and mix together, until all the dry ingredients have been incorporated.
6.  Take dessertspoonfuls of the mixture and gently press them into a ball in your hands.  Place on the baking tray, about 2.5cm/1" apart (to allow for growth!), and gently press down.
7.  Bake for 8-10mins until golden*.  Carefully transfer to a wire rack to cool (they are quite delicate until they have cooled).

*  My daughter prefers these biscuits slightly soft in the middle.  Take them out of the oven when they are golden brown around the edges and lighter in the middle.  If you prefer crunchy biscuits leave them in the oven until they are golden brown all over. 

Happy baking!


And here's a glimpse at the new products I have been working on.  These are now available in my Etsy shop and there will be more to come later in the week :-)


Happy weekend everyone!

Oh, I nearly forgot, don't miss out on the chance of winning this little fellow...

... find out how here.

Friday, 30 September 2011

Yummy Plummy Jam

I know, the recipe is a day later than intended, but last night I was on a mission to complete the 'Mr & Mrs' pillowcases I was making for a wedding gift.  Job, done... now for the jam!


This recipe is one that has come from my Good Housekeeping Recipe Book, a fab recipe book that I wouldn't be without, but one that I scoffed at when my husband came home with it!!!

If you have never made jam before, read the notes I have done at the bottom of the recipe.

The recipe makes about 4.5kg (10lb) of jam

2.7kg (6lb) plums
900ml (1 1/2pts) water
2.7kg (6lb) sugar
knob of butter

1.  Put the plums and water in a preserving pan and simmer gently for 30mins until the fruit is soft and liquid well reduced.

2.  Remove from the pan from the heat and add the sugar, stirring until dissolved, then add the knob of butter and return to the heat.  Bring back to the boil and boil rapidly for 10-15mins, stirring frequently until setting point is reached (please read notes).

3.  Take the pan off the heat, and use a slotted spoon to remove the plum stones, and any scum from the surface of the jam.  Pot and cover.

NOTE:  If dessert plums are used, add the juice of 1 large lemon.

MAKING JAM 

*  Don't use over ripe fruit when making jam as this can cause your jam to mould.

•  Use a preserving pan or very large pan so that you can maintain a fast boil without everything boiling over.  Make sure your pan is never more than half full when you start.  If you don't have a big enough pan split the fruit in half before adding the sugar and do in two batches.

•  How do you know when you have reached setting point?  It is important to test frequently for a setting point as if over cooked the jam will caramelize   The easiest way is with a sugar thermometer.  It is at setting point at 105°C (221°F).  If you don't have a sugar thermometer you can do the saucer test.  Put a couple of saucers in the fridge before you start making your jam.  At the end of step 2 put a little of your jam onto the saucer, push your finger across the jam, if it wrinkles and is beginning to set it has reached setting point.  If not boil jam for another 5 mins and repeat the test.

•  You must use spotlessly clean containers.  Use hot soapy water to wash, rinse thoroughly and dry in a warm oven.  Stand upside down on a clean tea towel in your oven until the jam is ready.  Cold jars are likely to crack when you pour the hot jam in.  Fill the jars almost to the top and immediately seal with a wax disc.  Leave to go completely cold before covering with dampened cellophane and securing with an elastic band.  If the jam is warm when it is sealed mould will grow on the surface.

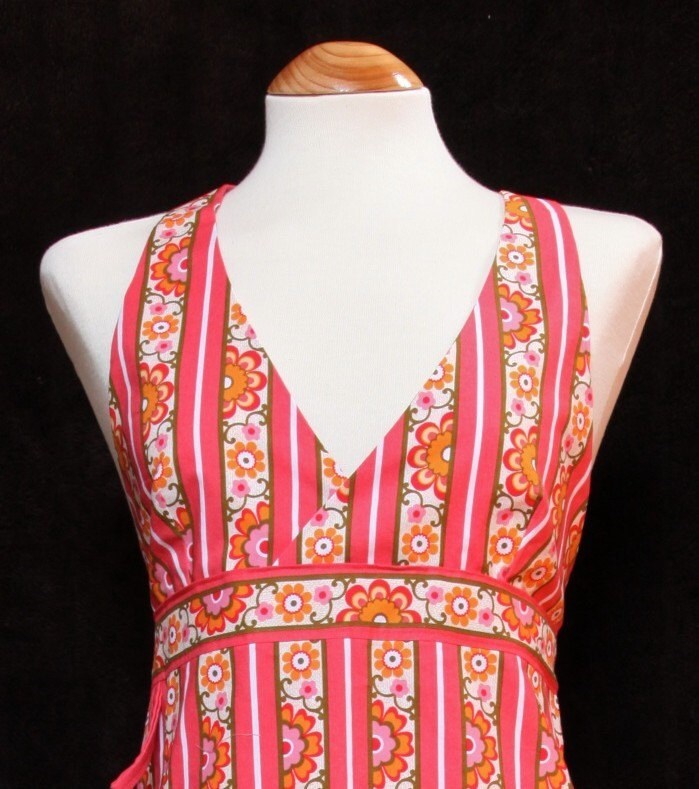
Jam making is definitely a job where you need a pinny.  These would be my favourite jam making pinnies, but I have more in my shop here if you fancy treating yourself before you start!


Saturday, 17 September 2011

Loula Belle At Home for children.

At the moment Loula Belle At Home is focusing on children as I feel it is important to encourage children to become more involved in activities in the home.

One of the activities that is very close to my heart, is the importance of learning how to cook, and having confidence in the kitchen.  With this in mind I have put together Little Belle, and Little Beau Utility Pinny Sets for age 2-6 year olds, consisting of a little denim pinny with an adjustable strap and pocket (for storing kitchen utensils if cooking, and gardening tools if gardening), a matching neckerchief...


... and a little bag to pop it in when it's not in use.  

My little boy loves putting on his utility pinny and helping mummy around the house whether this be cooking (which he loves) or getting the duster out, I'm sure you know someone that would love to look the part too!  These gift sets are available to buy online here.

N.B Keep your eyes open over the next month or so for the children's kits I am working on!


Saturday, 6 August 2011

Saturday Scone Making

I have had an extremely busy week this week, juggling looking after the children with getting myself sorted for yesterdays photo shoot for my new products (more about once I have received some of the lovely images!).

Today I was feeling quite lazy, staying in my pyjamas until after 10am (the children didn't get dressed until just before lunch!), allowing the children to sit in front of the TV whilst I indulged myself in a  book and then a bath!

This afternoon, we got down to business...


...and made scones. 

  I had been planning to make scones for our lovely neighbours (who very kindly keep an eye on our house when we are away) since we came back from our holiday.  I thought that this would be a good choice as one of them has diabetes, and didn't want to make something they couldn't eat. Unfortunately I had made an abundance of cakes the week we came back, and I couldn't stomach any more baking!  Today I overcame it and we got out our pinnies (me and the children that is!), and were able to indulge in scones with jam and cream, whilst our neighbours were delighted to receive theirs with strawberries and clotted cream.

We made fruit scones, here is the basic recipe, with variations below.

Scones - makes 8

225g (8oz) self raising flour                                                   
pinch of salt                                                                            
5ml (1tsp) baking powder                                                      
40g (1 1/2 oz) butter
approx. 150ml (1/4 pt) warm milk*
milk to glaze

1.  Set over to 220°C/425°F/Gas Mark 7.
2.  Sift the flour, baking powder and salt into a bowl, and then gently rub in the butter until the mixture looks like fine bread crumbs.  Stir in enough milk to form a dough.
3.  Roll on a lightly floured work surface until approx. 2cm (3/4 inch) thick, and cut into rounds with a 6cm (2 1/2 inch) circular cutter.
4.  Place on a greased baking tray, brush with a little milk, and bake in the over for around 10 mins until golden brown. 

Fruit Scones - simply add 50g (2oz) of sultanas, currants, dates, cherries or what ever you fancy before you add the milk.

Cheese Scones - stir in 50g (2oz) of finely grated cheddar before adding the milk, and then sprinkle a little on top after brushing with the milk.

* my mum read somewhere that using warm milk helps the scones to rise, making them  
   really light.  It works, and is worth doing!


The little Tinker brushing on the milk glaze. 
It's always difficult cooking with both of them.  There seems to be tussles
over every job that needs doing.  Although the Fairy is bigger,
the little Tinker is very determined!!!

Freshly bake scones crying out for jam and cream!
Both the children, and the kitchen were covered in flour by the end, I'm just pleased I can throw our pinnies in the wash with the rest of the laundry!

I thought you may like to see my granny Kitty's recipe for scones, taken from a hand written recipe book she had compiled (more to come at a later date!)


So, how about a Sunday scone making day?  Pop on your pinny, or pop over to my shop if you haven't got one, and get baking!

You can find more delicious recipes here.

Friday, 17 June 2011

Another cake for the weekend - Lemon Drizzle Cake


This is a very understated cake with serious mmmmmm factor!!!!  It's made even better by the fact that it is so simple to make!

It takes about an hour to make enough for 20 pieces, and is perfect for family picnics, camping trips etc. as it is so easy to transport.

175g/6oz softened butter
250g/9oz self-raising flour
1.5 tsp baking powder
250g/9oz caster sugar
3 large eggs
9 tbsp milk
finely grated zest of 1 large lemon

For the icing:
Juice of 1 lemon
100g/4oz  caster sugar

1.  Heat the oven to 180°/160°fan/gas mark 4.
2. Butter and line the base of a cake tin measuring 22x28cm with greaseproof paper.
3.  Put all the cake ingredients into a large mixing bowl and beat together  for 2-3 mins until the mixture drops easily off the spoon.
4.  Spoon the mixture into the prepared cake tin, and smooth.  Bake in the oven for 35-45mins until golden and firm*.
5.  To make the icing, beat the sugar and lemon juice to a paste.  Spoon this over the cake as evenly as possible whilst the cake is still hot, then leave to cool in the cake tin.  Cut into 20 pieces.

This cake keeps well wrapped in foil.  It can also be frozen.

*You can test that a cake is ready by using a sharp knife of skewer.  Insert into the centre of the cake.  If it is clean when you take it out, the cake is ready.  If not leave for 5mins before testing again.  If you feel the cake is getting too brown you can put a piece of kitchen foil loosely over the top.

Happy baking.  I am sure that this will become a family favourite!

N.B The lovely tea towel you can see in the image is a new product that will be available to buy very soon, along with the pinnies and other goodies in my shop.

You can find more delicious recipes here.


Tuesday, 7 June 2011

The winner has chosen...

... the beautiful pinny with the fabulous bird print.


Amy from The Patchwork Home was in touch with me yesterday evening and put her claim on this beautiful pinny.  It really is an excellent choice, and is now flying over to its new home, to play its part in the pinny revolution.  

Gail from seventyseventyone designs has also made her claim.  She wants a large cosmetic bag, but I haven't been informed which one as yet.

Hoorah to you both, and thanks again to those who entered.

N.B Please don't forget that there are only one of each of my halterneck pinnies available to buy.  When they have gone, there won't be any more!!

Monday, 6 June 2011

We have a winner!

We have winners...


... The Patchwork Home gets one of my lovely pinnies, and 7071 Designs will receive a £10 discount code to spend in my shop.  Could the winners please contact me with their email details.

This is how the draw was done... its was a very complex affair!!!

Step 1. Names were written on pieces of paper and put in one of the Fairy's handcrafted felt pots!


Step 2.  The fairy drew the winner.  


Step 3.  The Little Tinker drew the runner up.


Thanks to all who entered, and well done to the lucky winners!


Sunday, 29 May 2011

I'm giving away one of my lovely pinnies!


Do you fancy winning one of my lovely pinnies?  

You may like this one...


... or maybe this one.


Maybe you like the A-line pinnies...


... or fancy a Little Belle pinny for a special little girl.


The choice would be yours!

Not only will I be giving away a pinny, I will also be giving the runner up a voucher code to the value of £10 to spend in my shop! 

To be in with a chance of winning, there are a few things that you will need to do:
1.  Become a follower of my blog.
2.  Go and have a look in my shop,  decide which pinny you would like and why (while you are there you could click on the twitter and facebook icons!), then come back to my blog and leave a message on this post telling me which one you would like and why.
3.  Pop over to my facebook page and click on the 'like' icon.
4.  For an extra entry you can tweet the following message:
     I have entered the Pinny giveaway at @Loulabellehome.  You should too. http://t.co/KFt6b6h

The chance to enter this giveaway will end at midnight (GMT) on Sunday 5th June 2011, and the winner(s) will be announced on Monday 6th June 2011.

Please feel free to blog about this giveaway and put a link back to this post.

Friday, 13 May 2011

My first ever podcast!

A few weeks ago I recorded my first interview with Fiona at Happy4 PR.  It was a little scary to do, and the wait to hear it was almost unbearable.  It is so strange hearing your own voice back... I sound just like my little sister!!! You can click on the link to hear it.  I hope you like it!

Saturday, 7 May 2011

A Treat for the Weekend - Chocolate Cake Recipe

Here is the recipe for the delicious chocolate cake I made with my two lovely children last week for the Royal Wedding...

... and for the photo shoot a few months ago.


200g/7oz caster sugar
200g/7oz softened butter*
3 large free range eggs
200g/7oz self-raising flour
1 teaspoon baking powder
3 tablespoons cocoa powder
4 tablespoons milk

filling - 200ml/7fl oz double cream, 1 punnet strawberries (washed and halved)
topping - 100g/4oz butter, 100g/4oz quality cooking chocolate (dark chocolate), 100g/4oz icing sugar, 
3 tablespoons milk

* I always use butter.  You really can taste the difference in cake that has been made with butter!!!

1.  Pop on a lovely pinny (if you don't have one visit my shop beforehand!)
2.  Pre-heat the oven to 180°C/350°F/gas 4.  Grease and line base of 2 x 20cm/8 inch cake tins with greaseproof paper.
2.  Cream together the butter and sugar until light and fluffy.  Add flour sifted with the cocoa and baking powder, eggs and 4 tablespoons of milk.
3.  Mix well and divide between the two cake tins.  Bake for approximately 25mins.  Once cooked leave in the tins until cooled.
4.  Make the topping by melting the ingredients in a bowl above a simmering pan of water.  Stir until well blended and then leave to cool.
5.  Put the cake together by whipping the cream into gentle peaks.  Spread this over one of the sponges, then add the strawberries on top.  Put the final cake on top and gently press down.
6.  Drizzle over your chocolate topping (as the lovely ladies did!!) and allow your topping to harden a little before you eat (if you can resist it!!!!!!).

Happy cake eating.

You can find more delicious recipes here.


Tuesday, 5 April 2011

Cupcakes v's Macaroons

For a while now I have been seeing glorious coloured Macaroons piled high on pretty plates, and reading little snippets here and there about how Cupcakes are passe, having been displaced by brightly coloured delights!!

I decided that I would put them to the test and make some Macaroons myself.  The perfect opportunity arose when we did the photo shoot a few weeks ago.  I decided I would make some and the girls on the shoot could finish them off.  

I had great fun making them...


...I know that things look pretty orderly here, but what a messy process.  I cannot believe how sticky the mixture is.  I was sooooo pleased that I had decided to wait until both children were in bed before I started.  It is certainly not a baking activity I would embarked upon with children!!!

The girls enjoyed putting them together, covering their clothing, from sticky messiness, in my new design A-line pinnies (available to buy very soon!!!)


So, what was the verdict?  We sampled them (I had sampled them the previous night) and the overall consensus was that they are too sweet (understandably considering the amount of sugar in them), and if given the choice cake would rule!!!  The only conclusion that I can come to is that the cupcakes that are being referred to are those overly decorated examples that make me feel slightly queasy just looking at them, rather than the ones the Fairy puts together...erm there is time for her yet (see here for an example of her handy work)!!!

Give me this fabulous chocolate cake, filled with cream and strawberries and covered with a chocolate sauce sent from heaven any day!!!


What would you choose?